
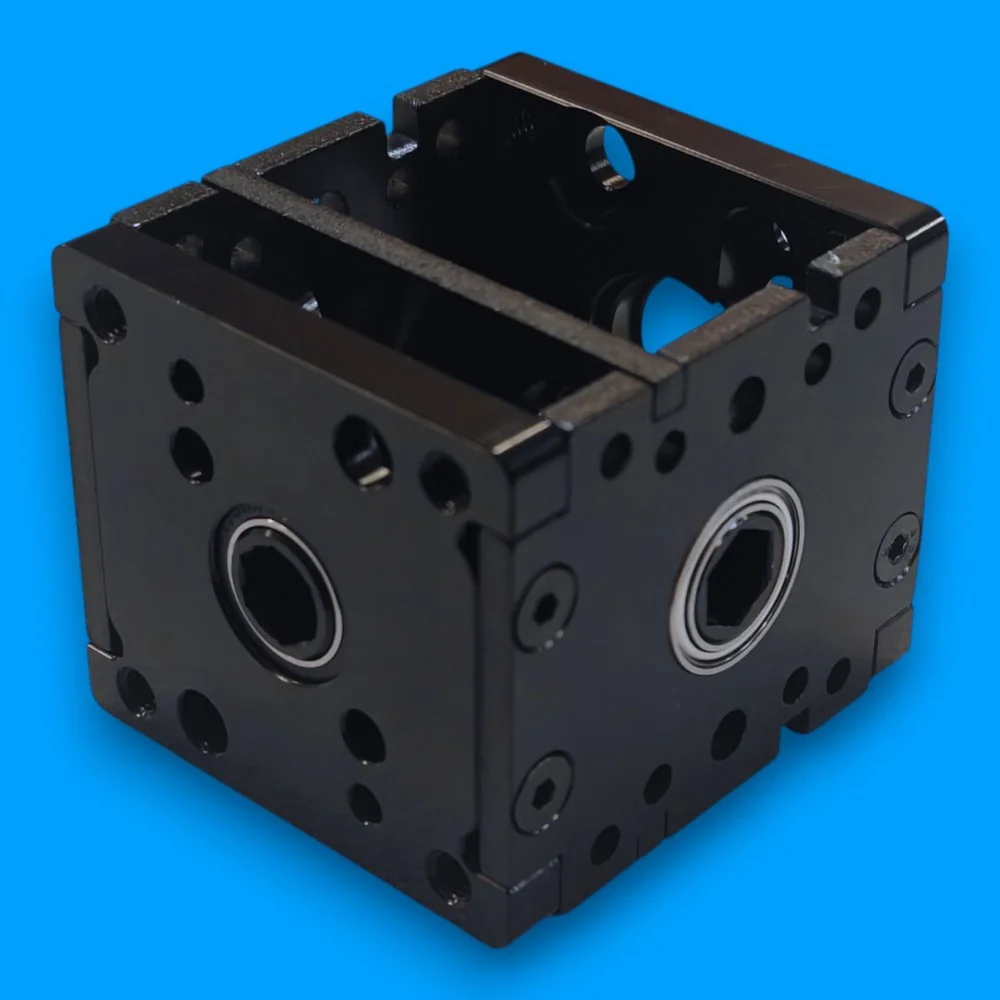
| Product | SWYFT 90° Gearbox |
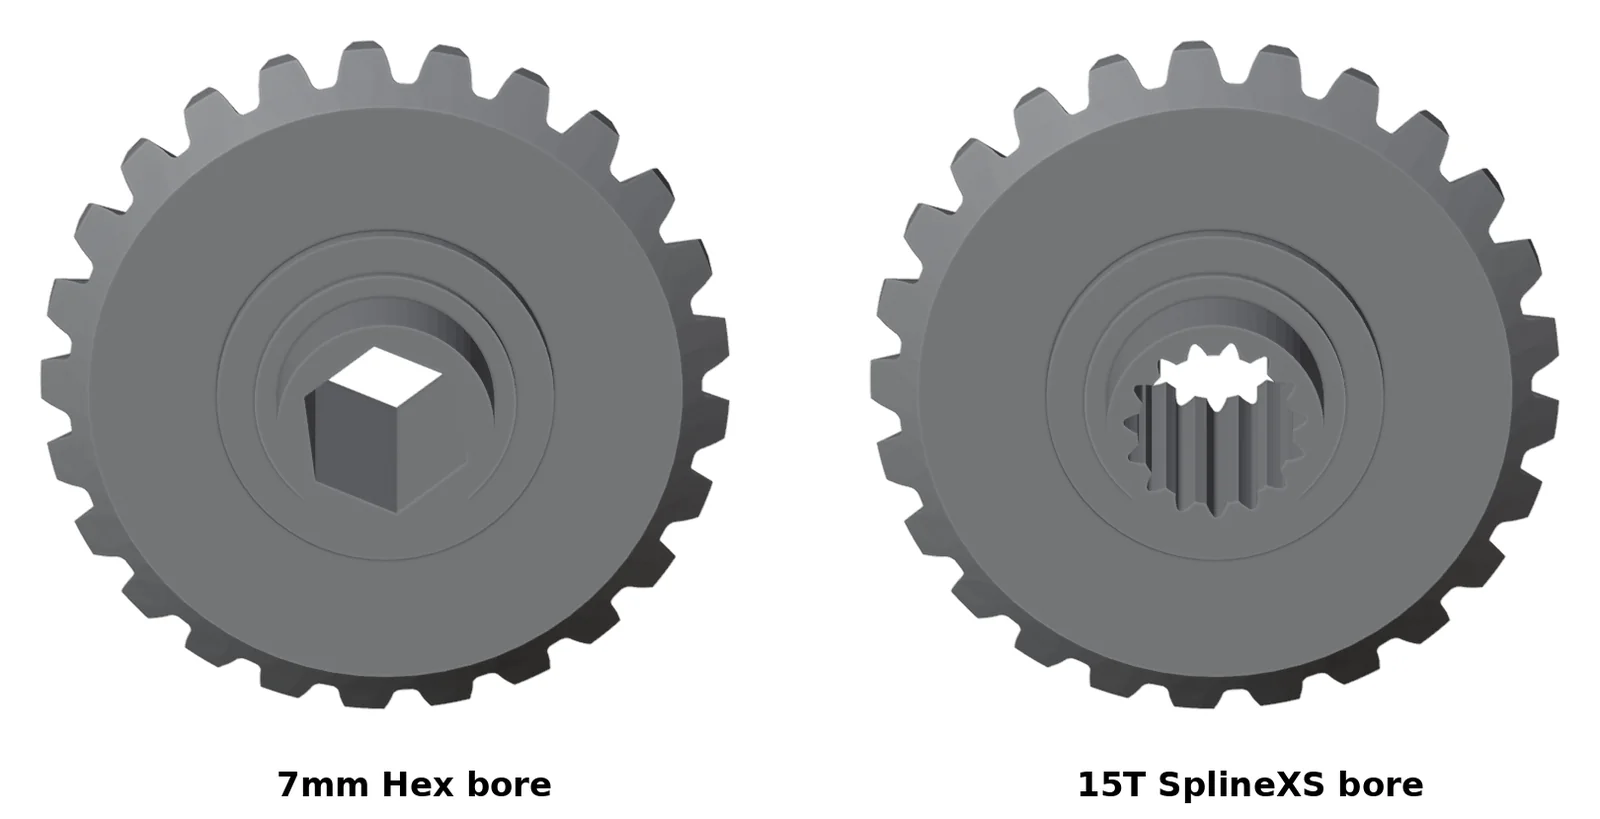
| SKUs | SR-90GEARBOX-7mmHEX-01 (7mm Hex bore) · SR-90GEARBOX-15TSPLINE-01 (15T SplineXS bore) |
| Assembly time | About 5 minutes |
| Item | Notes |
|---|---|
| 2 mm Allen key | Included in the kit |
| Red tacky grease | Recommended for the gear teeth |
| Blue Loctite (medium strength) | Recommended for the screws |
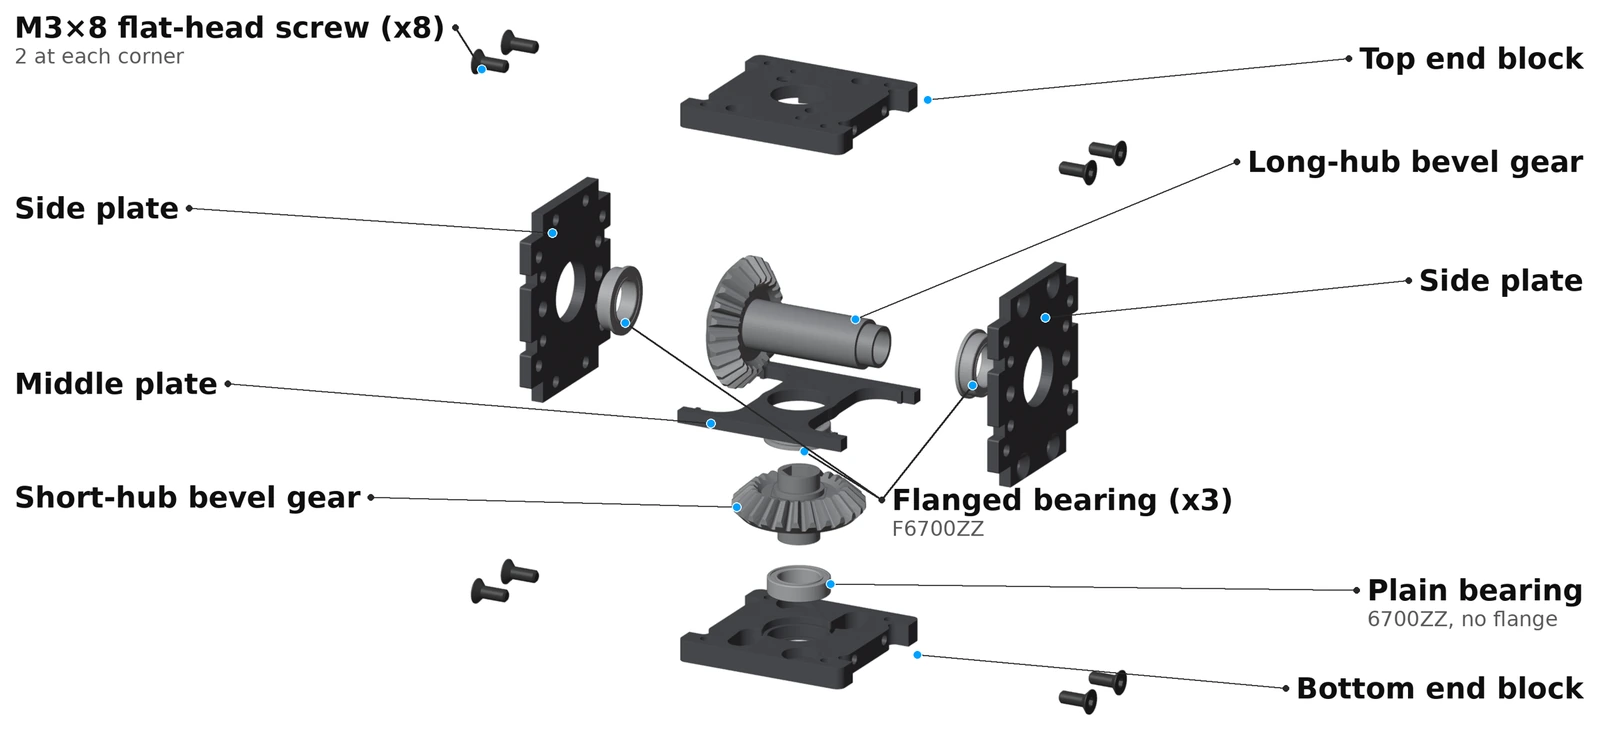
The kit has 2 end blocks (the top and bottom blocks are the same part), 2 side plates, 1 middle plate, 4 bearings (3 flanged F6700ZZ and 1 plain 6700ZZ), 2 bevel gears (one with a short hub and one with a long hub), 8 M3×8 flat-head screws, and the 2 mm Allen key. Each gear comes with its hub already attached.
Countersinks face outward so the screw heads sit flush with the side plates.
In the pictures, blue = parts you add in that step, grey = parts already in place, and the orange arrow shows which way the part moves.
All of the bearings are a slip fit. Push them in by hand. You don't need a pressing tool.
Lay everything out and check it against the exploded view: 2 end blocks, 2 side plates, 1 H-shaped middle plate, 4 bearings (3 with a flange, 1 without), 2 gears (one short hub, one long hub), 8 screws, and the Allen key.
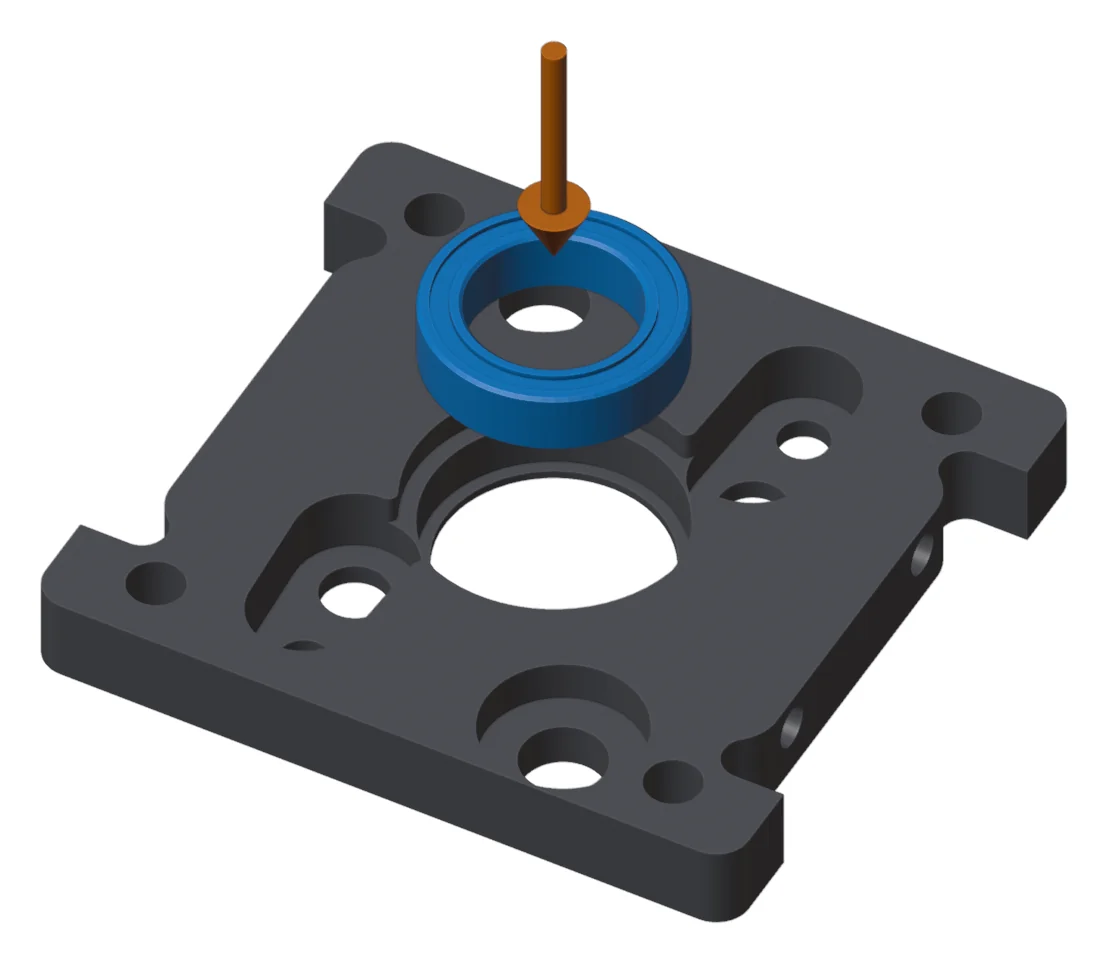
Push the plain 6700ZZ bearing (no flange) into the center hole of one end block by hand, from the inside face. It stops against a small lip on the outside face. This block is now the bottom block. The other end block doesn't get a bearing.
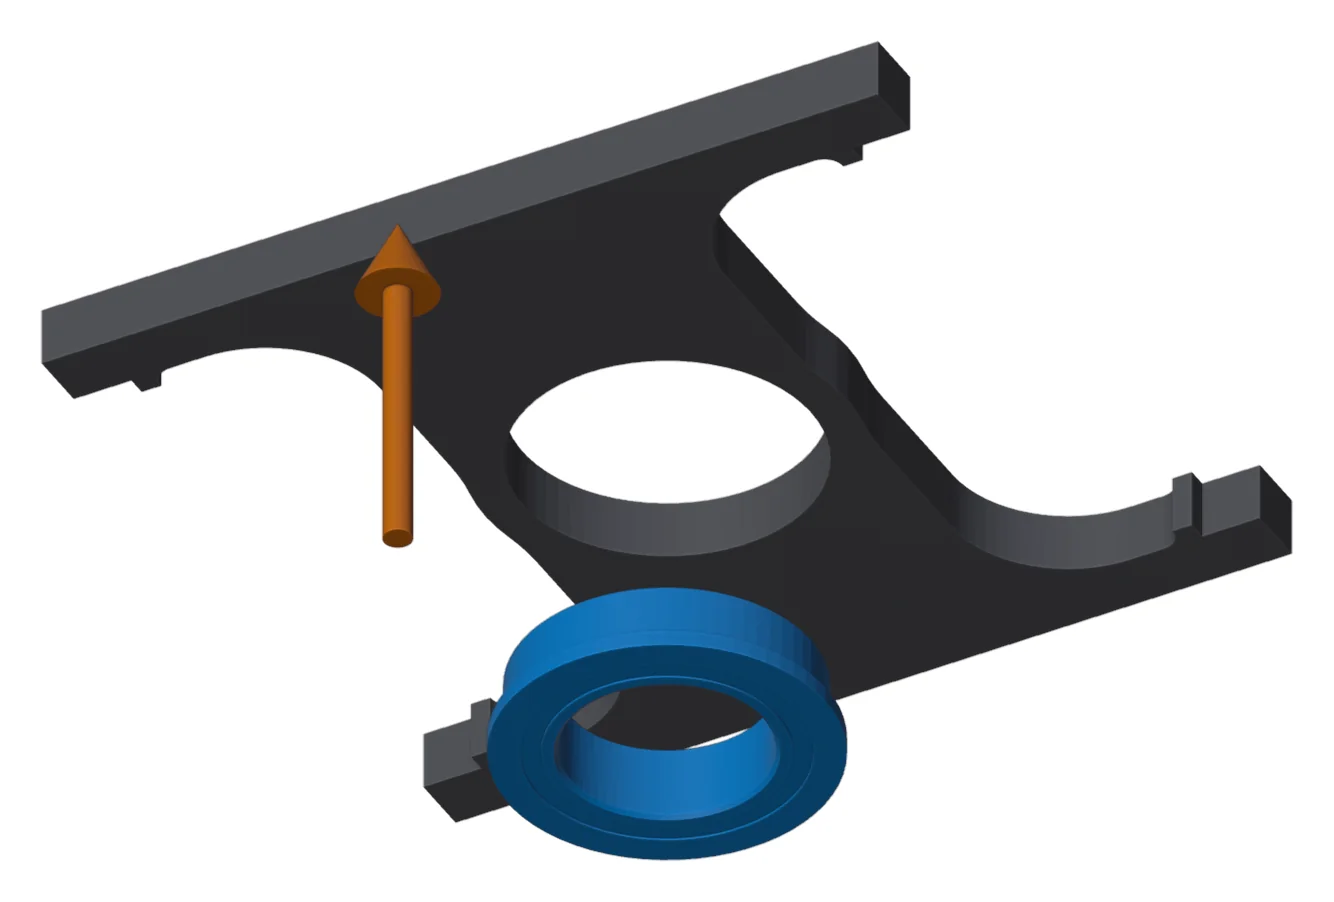
Push one flanged F6700ZZ bearing into the center hole of the H-shaped middle plate by hand. The flange goes on the underside, the side that faces the bottom gear.
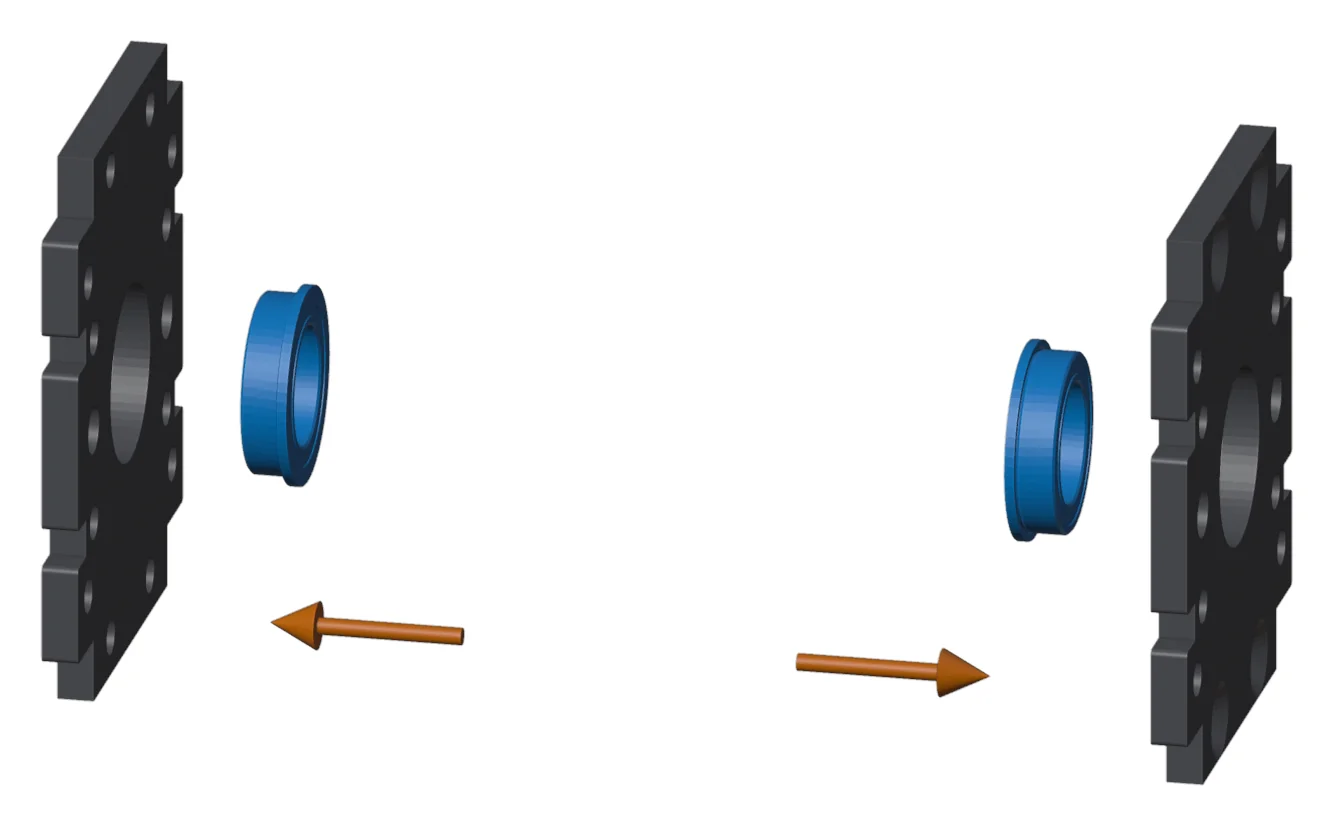
Push a flanged F6700ZZ bearing into the center hole of each side plate by hand, from the inside face, so the flange ends up inside the gearbox. The inside face is the side without the countersinks.
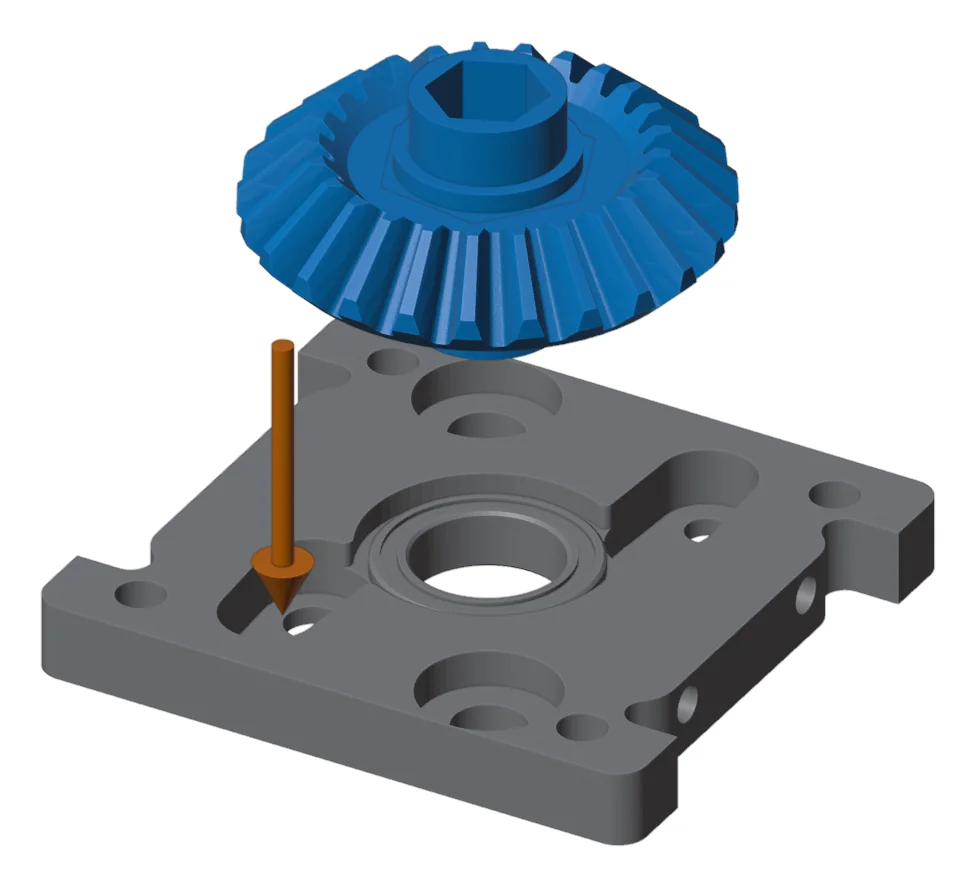
Drop the short-hub gear into the bottom block with its teeth facing up. The end of the hub goes into the bearing from Step 2.
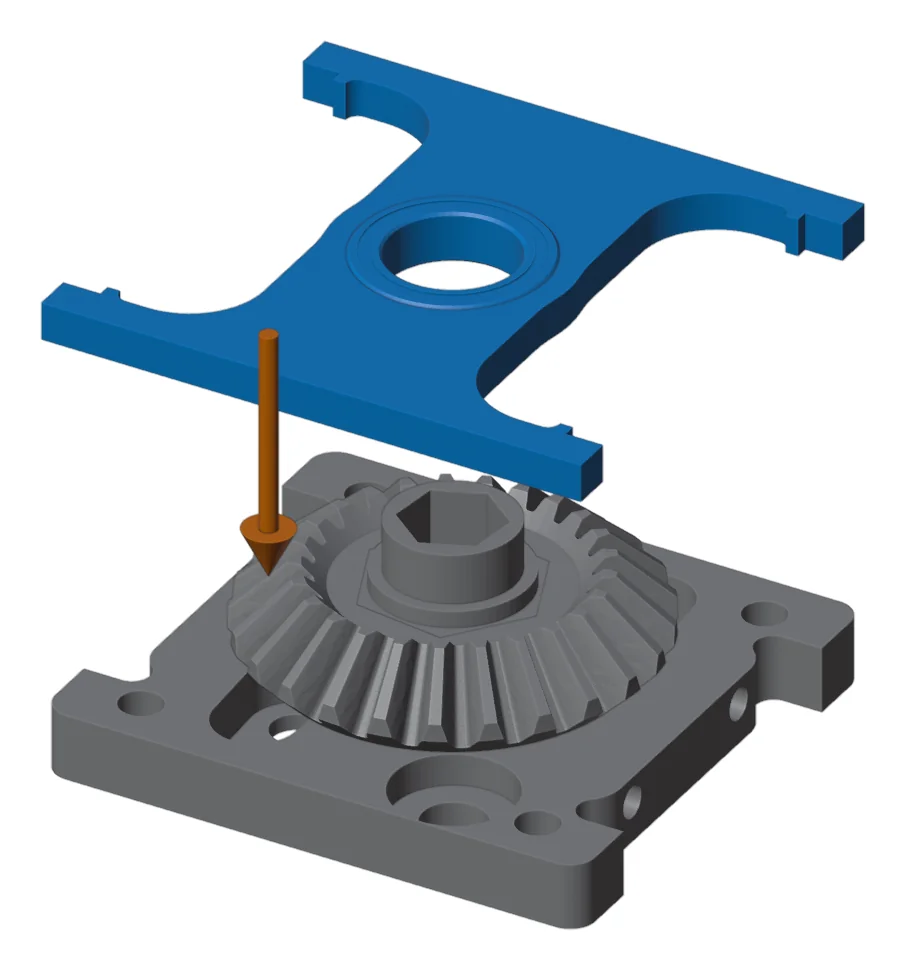
Lower the middle plate, with its bearing, onto the top of the short hub so the hub goes into the middle-plate bearing. The flange faces down toward the gear. The gear is now held between the bottom block and the middle plate. The tabs on the middle plate fit into slots in the side plates in Steps 8 and 9.
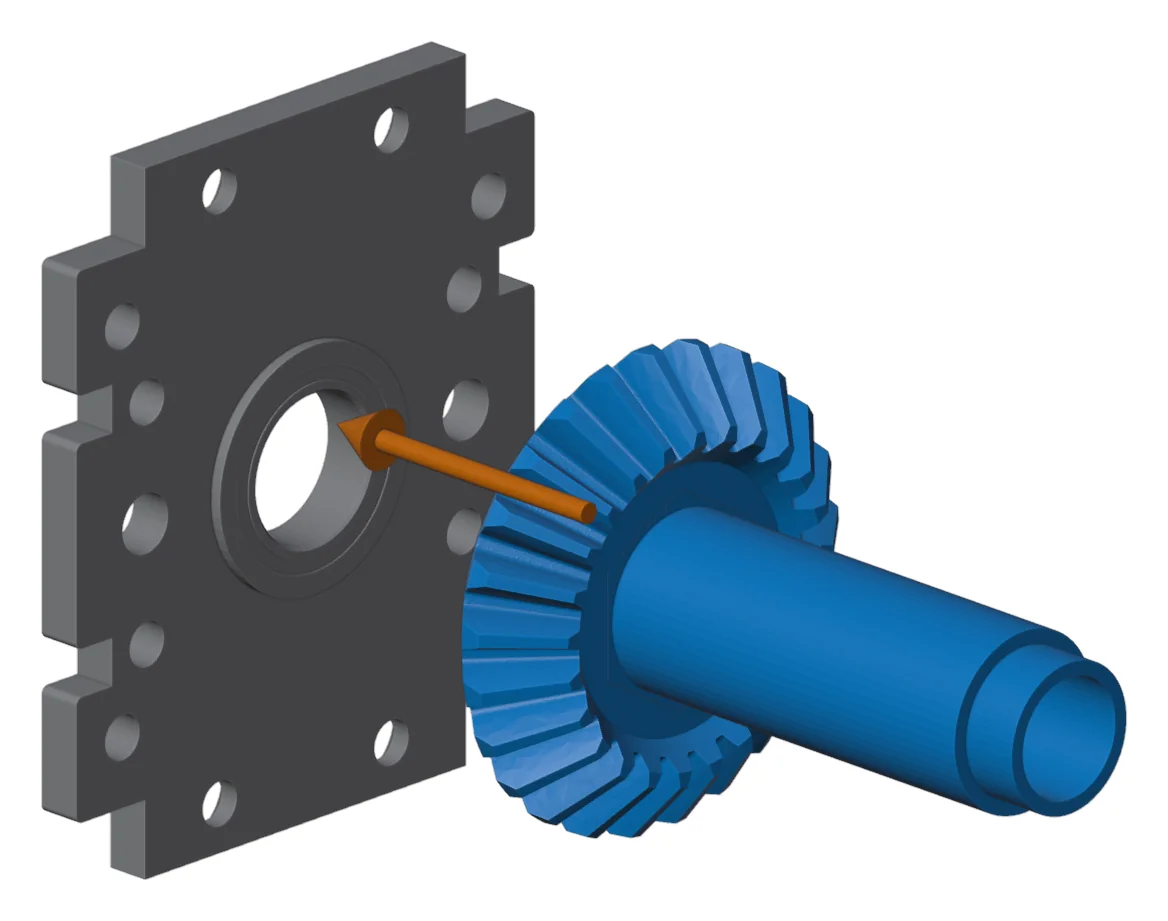
From the inside of one side plate, slide the long-hub gear through that plate's bearing until the gear sits next to the bearing flange. The gear is too big to pass through the bearing, so it has to go in from the inside.
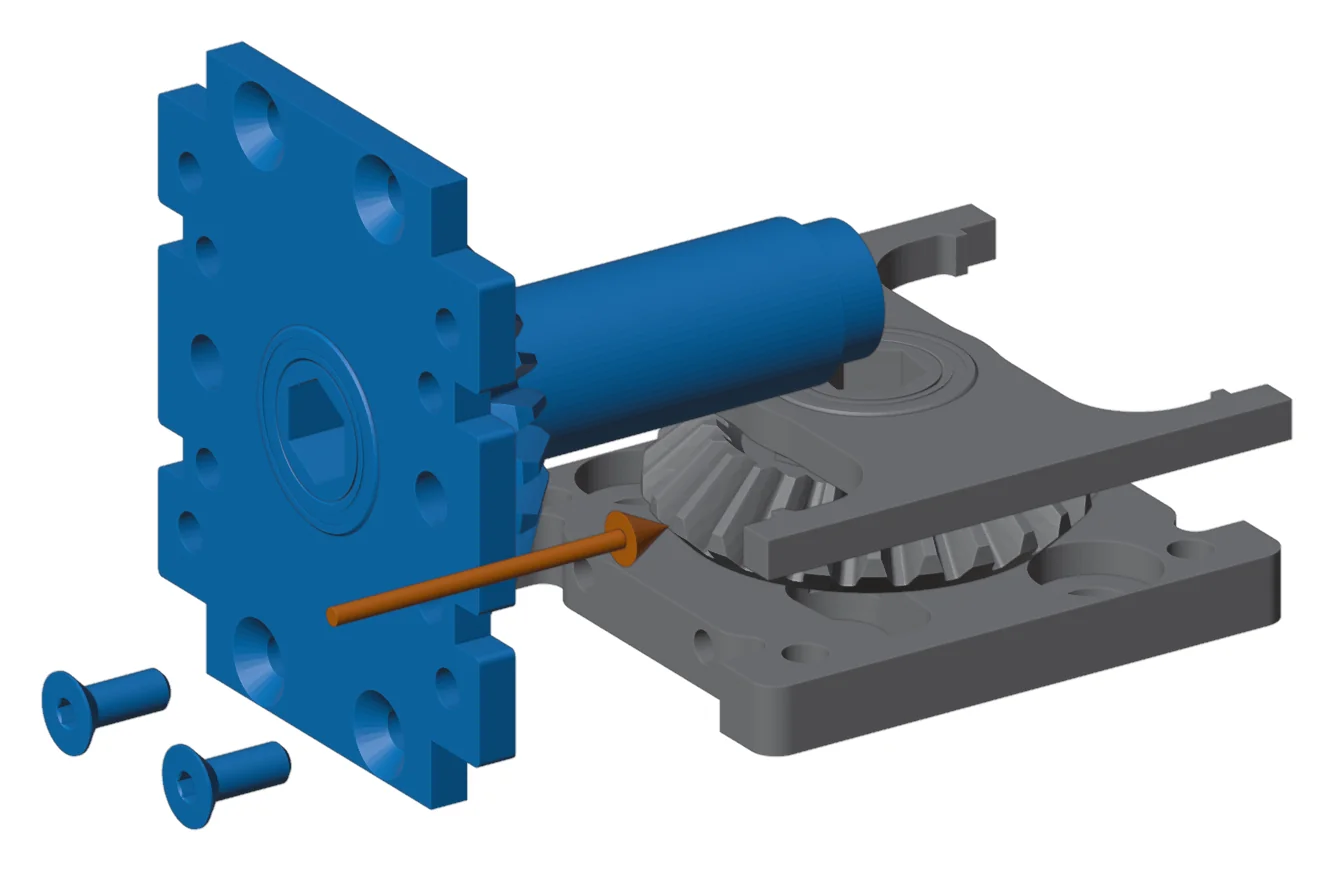
Put a thin layer of red tacky grease on the teeth of both gears. Then bring the side plate and long-hub gear onto the bottom block and middle plate:
Put a drop of blue Loctite on 2 × M3×8 flat-head screws and start them through the side plate into the bottom block. Leave them loose for now.
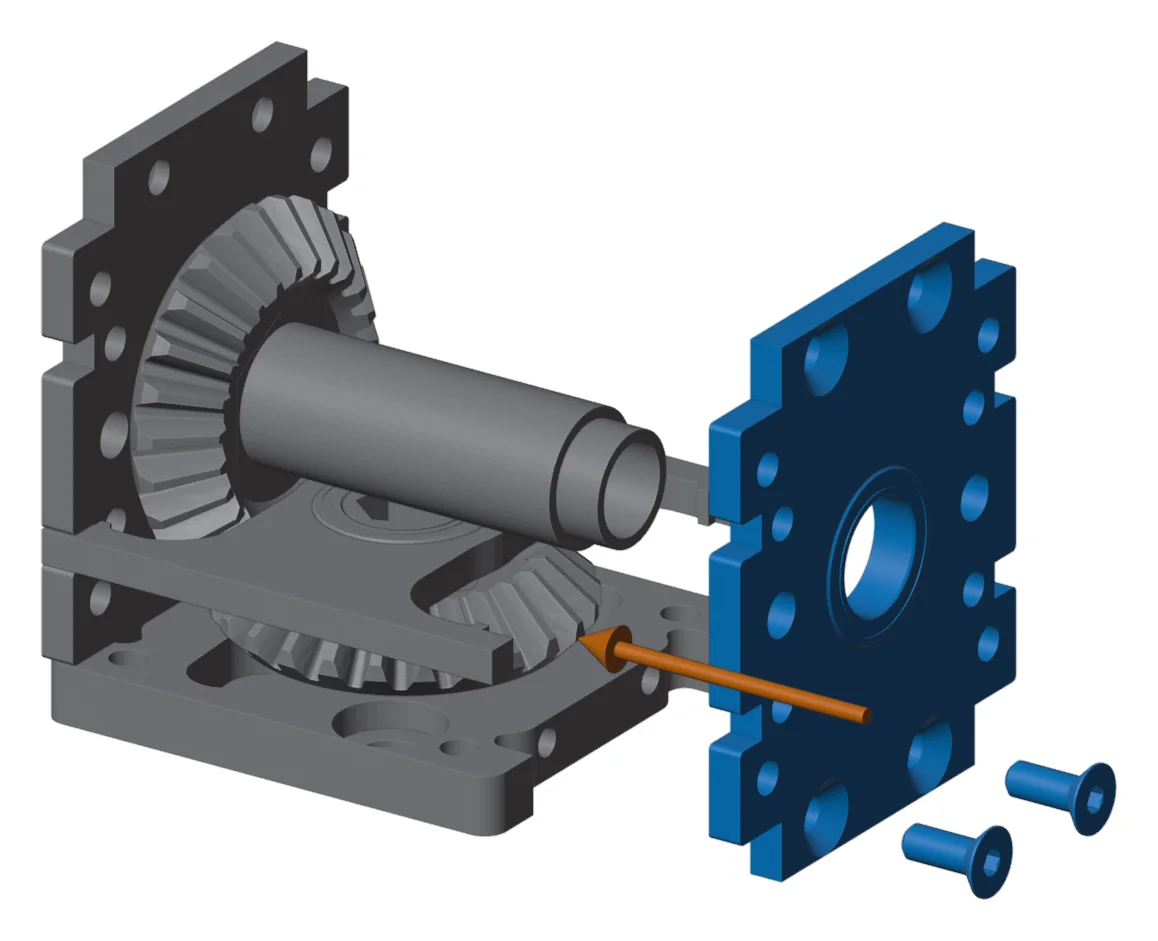
Slide the second side plate over the free end of the long hub so the hub goes into this plate's bearing. Fit the middle-plate tab into its slot and seat the plate against the bottom block. Start 2 more M3×8 screws, with Loctite, and leave them loose.
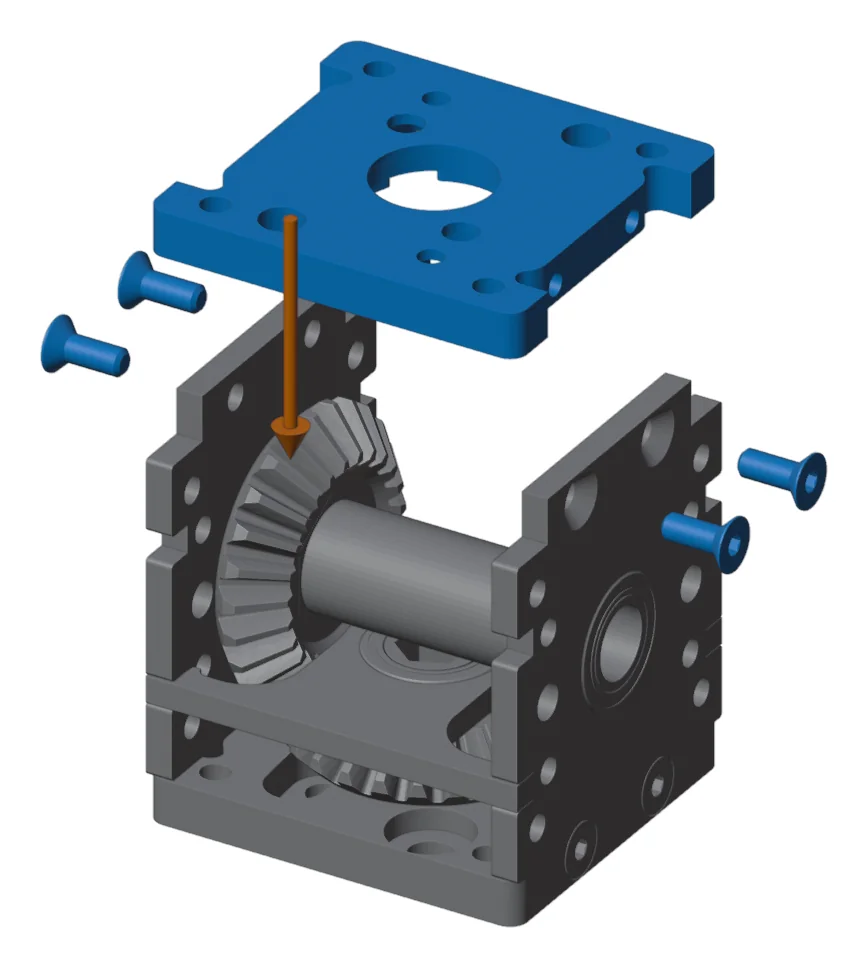
Put the second end block (the one with no bearing) on top, between the side plates. Start the last 4 × M3×8 screws with Loctite, 2 per side.
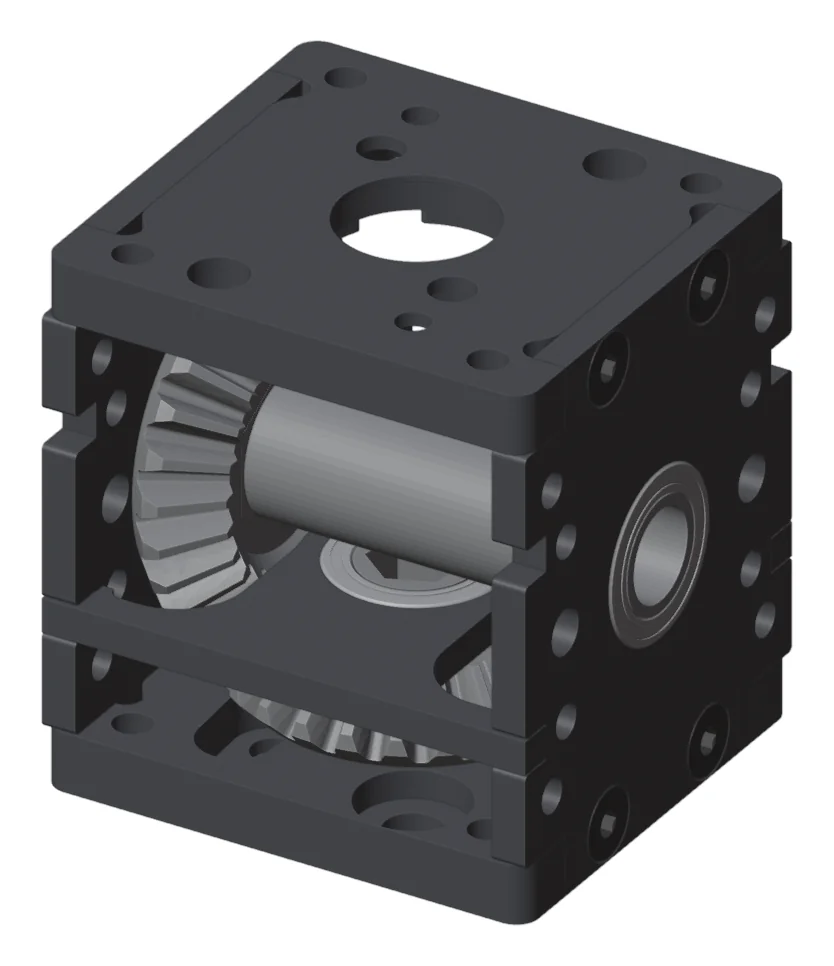
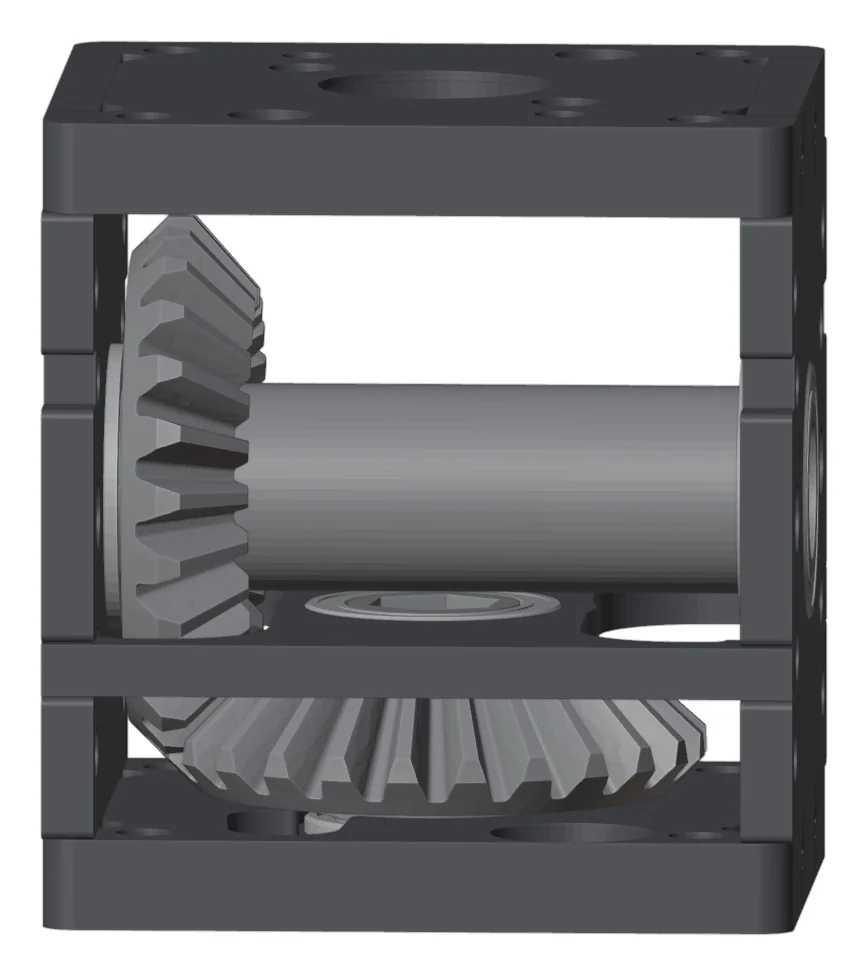
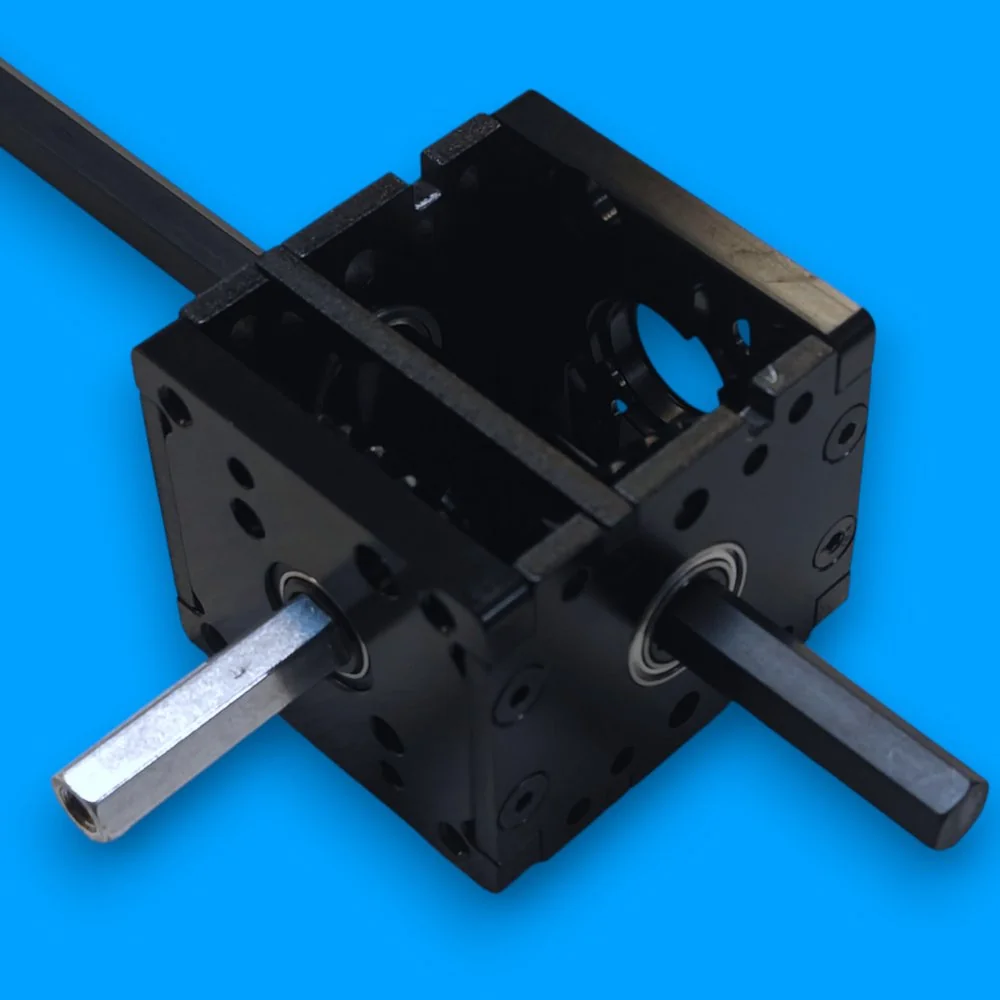
The gearbox stays fully assembled when you change the input and output shafts, so you don't need to take it apart.